
Jetpack ComposeでRetrofit2を使って天気予報アプリを作ってみた
2023.06.11
Jetpack ComposeでOpen Weather のJSONデータから 日本の天気予報アプリを作ったメモ書きです。
概要
都市名を半角ローマ字入力しボタンを押すと入力都市の5日間3時間ごとの天気を表示する。
入力例:那覇市→naha, 愛知県→aichi
準備
- *参考にさせていただきました:
環境
・ Android Studio: Flamingo 2022.2.1 Patch2
作成
1. 新規プロジェクトの作成
Empty Activityを選択。
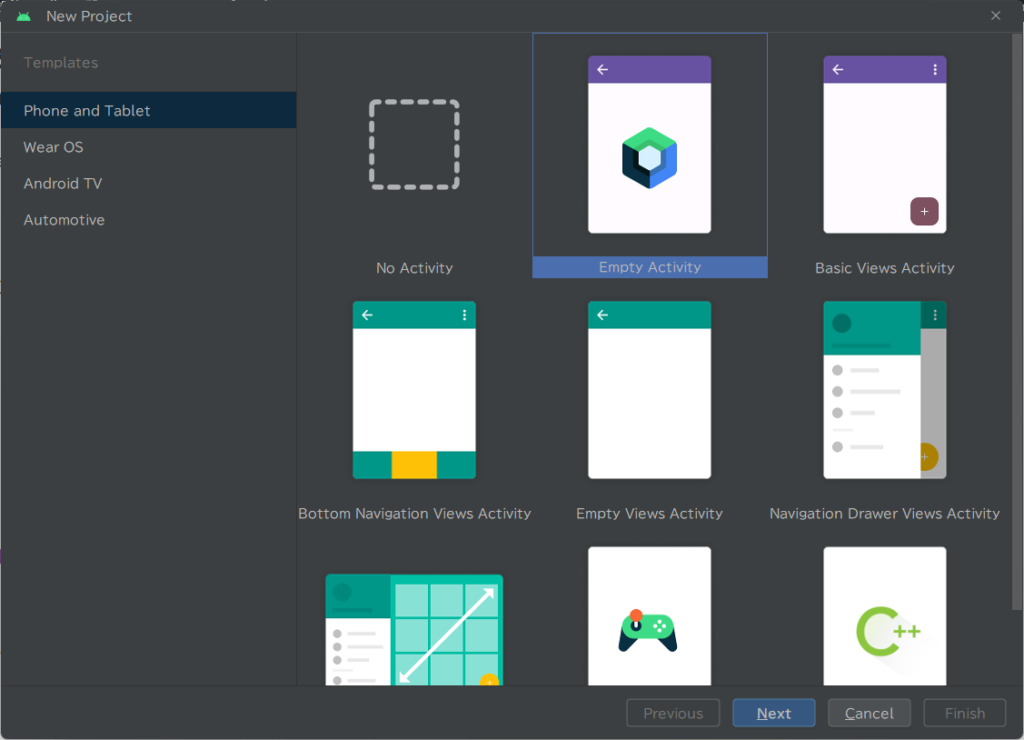
Next → name: Weather Forecast Jp で作成しました。
2. 作成環境準備
主なライブラリ:
・Retrofit2
・Gson
・Coil
Gradle SCripts/build.gradle (module : app)のdependencies{}内にライブラリ情報を記述する。
マニュフェストファイルにネットワークについて追記する。
<?xml version="1.0" encoding="utf-8"?>
<manifest xmlns:android="http://schemas.android.com/apk/res/android"
    xmlns:tools="http://schemas.android.com/tools">

    <uses-permission android:name="android.permission.INTERNET" /> <!---これです-----/>

    <application
        android:allowBackup="true"
        android:dataExtractionRules="@xml/data_extraction_rules"
        android:fullBackupContent="@xml/backup_rules"
        android:icon="@mipmap/ic_launcher"
  -------
3. API から JSON を受け取るための data classを作成
今回のOpen Weather APIのURL:
http://api.openweathermap.org/data/2.5/forecast? q={ 都市名 },jp&units=metric&lang=ja&APPID={ 取得したAPI_KEY }
都市名を toyota で検索
このような JSONデータ を取得しました。
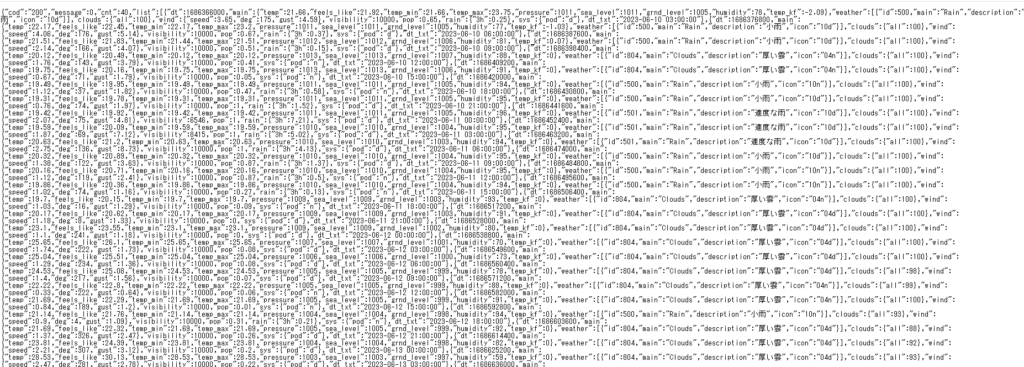
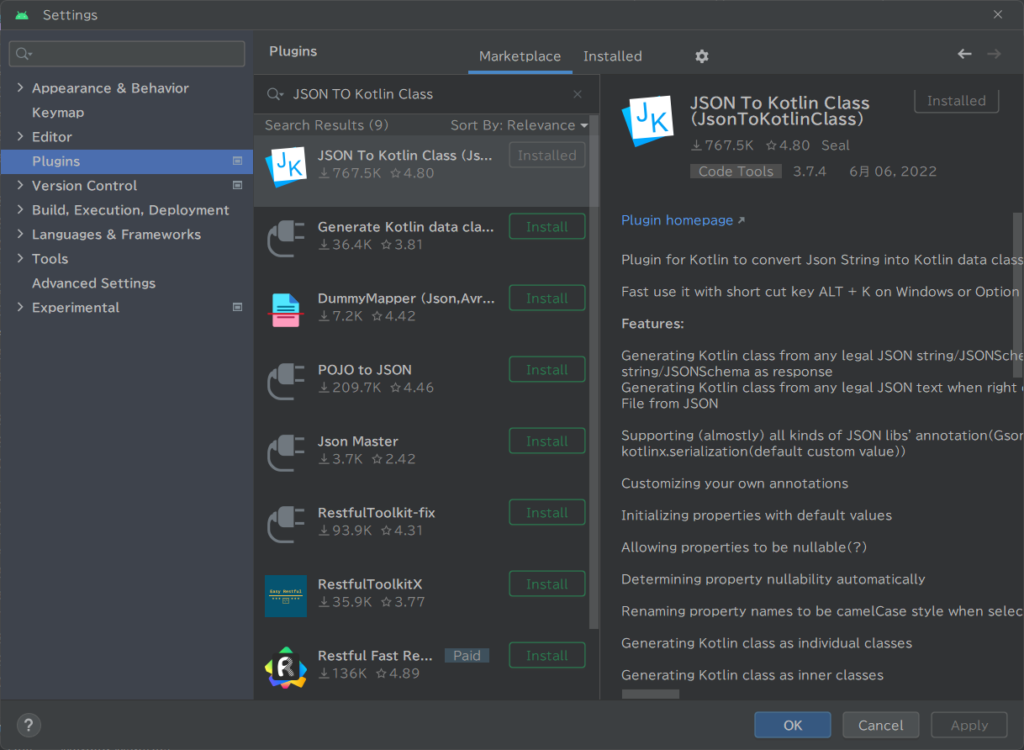
ここから data classを作成するのが大変そうなので、JSON TO Kotlin Class のプラグインを使いました。
File > Settings > Editor/plugins を選択し、JSON TO Kotlin Class で検索しInstallする。
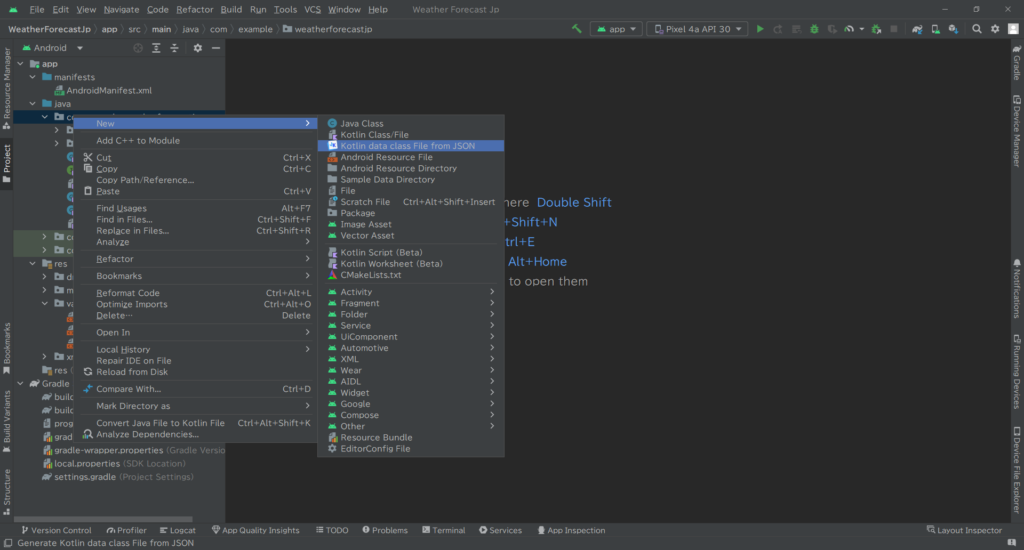
classファイルを入れたいフォルダで右クリック、new > Packageを選択して NEW Packageを作成する。(ここでは weatherstate にしました。)
weatherstateフォルダで右クリック、new > Kotlin data class File From JSONを選択する。
画面内で右クリックして Retrieve content from Http URL を選択する。

先ほどJSONデータを取得した URL を入力する。
OKを押すと JSONデータが画面に表示される。1行横に表示されているので Format ボタンを押す。(しなくてもいいかも)
Class Name: に入力する。(今回は、WeatherItemと入れました。)
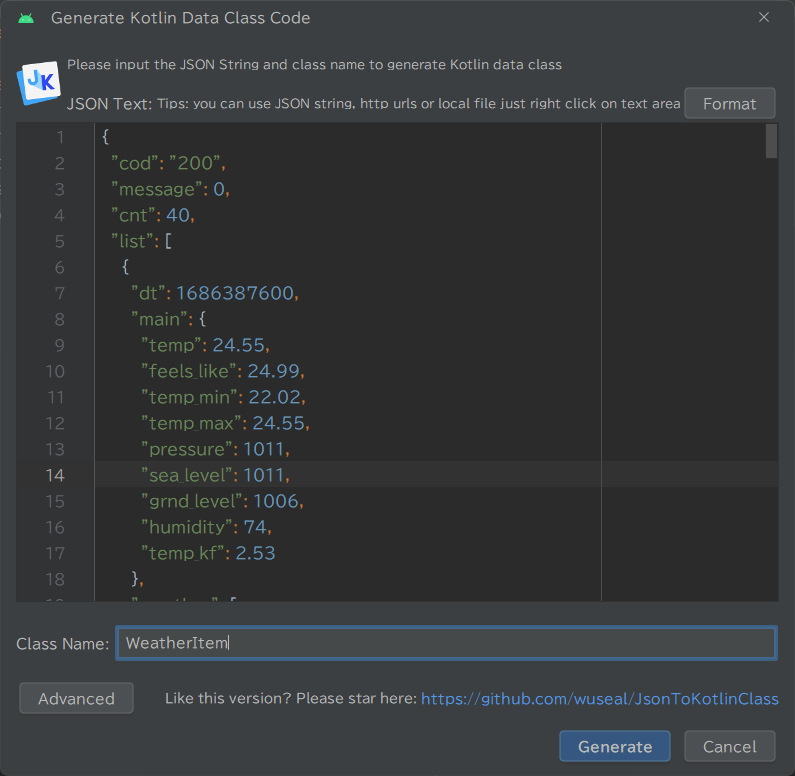
Genarate ボタンを押すと weatherstate フォルダ内に data class file が入ります。
確認すると、名前のないファイルが1つ存在していた(ファイル名 .kt)ので、このままでいいかわかりませんが WeatherData とClass名を付けファイル名も同じにしました。
WeatherItem classの val list: List<>を val list: List<WeatherData>にしました。
4. 応答データを保持する data class作成
日時、天気、気温、湿度、気圧、天気イメージの応答データを保持するようにしました。
*このほかにも最低/最高気温、風速etcなどのデータもあります。
Forecast.kt
data class ForecastItems(
    val date: String,  //<----日時
    val description: String,  //<--天気
    val temp: Double, //<--気温
    val humidity: Int, //<--湿度
    val pressure: Int, //<--気圧
    val icon: String //<--天気Image
)
5. Retrofit作成
ApiService.kt
nterface ApiService {
     @GET("/data/2.5/forecast?")
     suspend fun getWeather(
         @Query("q") cityName: String,
         @Query("units") units: String,
         @Query("lang") lang: String,
         @Query("appid") appId: String
     ): WeatherItem
}
ApiRepos.kt
class ApiRepos {
    private fun getRetrofit(): Retrofit {
        return Retrofit.Builder()
            .addConverterFactory(GsonConverterFactory.create())
            .baseUrl(BASE_URL)
            .build()
    }

    fun get(): ApiService{
        val retrofit = getRetrofit()
        return retrofit.create(ApiService::class.java)
    }
}
6. ViewModel 作成
ForecastViewModel.kt
class ForecastViewModel : ViewModel() {
    suspend  fun getForecast(cityName: String, city: MutableState<String>, weather: MutableList<ForecastItems>) {
        weather.clear()
        city.value = ""
        viewModelScope.launch(Dispatchers.IO) {
            val api = ApiRepos().get()
            try {
                val response = api.getWeather(cityName, UNITS, LANG, APIKEY)

                val lists = response.list
                for (listItems in lists) {
                    val dates = listItems.dt_txt
                    val temp = listItems.main.temp
                    val humidity = listItems.main.humidity
                    val pressure = listItems.main.pressure
                    val descriptionLists = listItems.weather
                    for (descriptionItem in descriptionLists) {
                        val description = descriptionItem.description
                        val icon = descriptionItem.icon

                        val iconUrl = "https://openweathermap.org/img/w/$icon.png"

                        weather.add(ForecastItems(dates, description, temp, humidity, pressure, iconUrl))

                    }
                }
                val cities = response.city.name
                city.value = cities

            } catch (e: Exception) {
                Log.d("Response Data", "debug $e")
            }
        }
    }
}
7. Main 作成
MainActivity.kt
BuildConfig.API_KEYの部分に、”API Key”を入れる。
class MainActivity : ComponentActivity() {

    companion object{
        const val BASE_URL = "https://api.openweathermap.org"
        const val UNITS = "metric"
        const val LANG = "ja"

        const val APIKEY = BuildConfig.API_KEY //<-- API Keyをここに入れる
    }

    override fun onCreate(savedInstanceState: Bundle?) {
        val viewModel = ViewModelProvider(this)[ForecastViewModel::class.java]
        super.onCreate(savedInstanceState)
        setContent {
            WeatherForecastJpTheme {
                // A surface container using the 'background' color from the theme
                Surface(
                    modifier = Modifier.fillMaxSize()
                ) {
                        mainScreen(viewModel)
                }
            }
        }
    }
}
MainScreen.kt
@OptIn(ExperimentalMaterial3Api::class, ExperimentalComposeUiApi::class)
@Composable
fun mainScreen(viewModel:ForecastViewModel) {

    val city = remember { mutableStateOf("") }
    val weather = remember { mutableStateListOf<ForecastItems>() }
    val keyboardController = LocalSoftwareKeyboardController.current

   Box(modifier = Modifier.background(Color.LightGray)){
      Column {

         Row(modifier = Modifier
             .fillMaxWidth()
             .wrapContentHeight(),
             horizontalArrangement = Arrangement.SpaceEvenly,
             verticalAlignment = Alignment.CenterVertically
         ){
             var  name by remember { mutableStateOf("")}

                 OutlinedTextField(value = name, onValueChange = {name = it},
                     label = {Text(stringResource(id = R.string.city_name), color = Color.Blue)},
                     modifier = Modifier
                         .padding(10.dp),
                     colors = TextFieldDefaults
                         .outlinedTextFieldColors(textColor = Color.Blue,
                         focusedLabelColor = Color.Blue,
                             focusedBorderColor = Color.Blue)
                 )
                Column {

                    Spacer(Modifier.size(10.dp))

                    Button(modifier = Modifier,
                        onClick = {
                            runBlocking {
                                viewModel.getForecast(name, city, weather)
                            }
                            name = ""
                            keyboardController?.hide()
                        },
                        contentPadding = PaddingValues(8.dp),
                        colors = ButtonDefaults.textButtonColors(
                            Color.Blue,
                            contentColor = Color.White,
                            disabledContentColor = Color.LightGray),
                    ){
                        Text("GO")

                    }
                }

        }

          Text(city.value,
              modifier = Modifier
                  .fillMaxWidth()
                  .padding(start = 0.dp, top = 8.dp, end = 25.dp, bottom = 8.dp),
              textAlign = TextAlign.End,
              fontSize = 24.sp,
              color = Color.Blue
          )

          LazyColumn(modifier = Modifier
              .fillMaxSize()
              .padding(start = 25.dp, top = 5.dp, end = 25.dp, bottom = 5.dp)){
              items(weather){weather -> WeatherTtem(weather)}
          }
      }
     }
  }

@Composable
fun WeatherTtem(weather: ForecastItems) {
    Column {
        Box(modifier = Modifier
            .fillMaxWidth()
            .background(color = Color.Gray, shape = RoundedCornerShape(10.dp))
            .padding(8.dp)
           ){
            Column {
                Row(modifier = Modifier.fillMaxWidth(),
                    horizontalArrangement = Arrangement.SpaceBetween,
                    verticalAlignment = Alignment.CenterVertically
                    ) {
                    Text(text = weather.date, modifier = Modifier, textAlign = TextAlign.Start, fontSize = 20.sp, color = Color.White)
                    Text(text = weather.description, modifier = Modifier.padding(start = 0.dp, top = 0.dp, end = 15.dp, bottom = 0.dp)
                        ,textAlign = TextAlign.End ,fontSize = 20.sp, color = Color.White)
                }
                Row(modifier = Modifier
                    .fillMaxWidth(),
                    horizontalArrangement = Arrangement.SpaceBetween,
                    verticalAlignment = Alignment.CenterVertically) {
                    Column {
                        Row(modifier = Modifier,
                            horizontalArrangement = Arrangement.SpaceBetween,
                            verticalAlignment = Alignment.CenterVertically){

                            Text(text =stringResource(id = R.string.temp),
                                modifier = Modifier
                                    .padding(start = 10.dp, top = 5.dp, end = 10.dp, bottom = 5.dp),
                                textAlign = TextAlign.Start,
                                fontSize = 18.sp, color = Color.White)

                            Text(text = weather.temp.toString(),
                                modifier = Modifier
                                    .padding(start = 0.dp, top = 5.dp, end = 5.dp, bottom = 5.dp),
                                textAlign = TextAlign.Center,
                                fontSize = 18.sp, color = Color.White)

                            Text(text = stringResource(id = R.string.temp_unit),
                                modifier = Modifier
                                    .padding(start = 5.dp, top = 8.dp, end = 0.dp, bottom = 5.dp),
                                textAlign = TextAlign.Start,
                                fontSize = 16.sp, color = Color.White)
                        }
                        Row(modifier = Modifier,
                            horizontalArrangement = Arrangement.SpaceBetween,
                            verticalAlignment = Alignment.CenterVertically) {

                            Text(text =stringResource(id = R.string.humidity),
                                modifier = Modifier
                                    .padding(start = 10.dp, top = 5.dp, end = 10.dp, bottom = 5.dp),
                                textAlign = TextAlign.Start,
                                fontSize = 18.sp, color = Color.White)

                            Text(text = weather.humidity.toString(),
                                modifier = Modifier
                                    .padding(start = 0.dp, top = 5.dp, end = 5.dp, bottom = 5.dp),
                                textAlign = TextAlign.Center,
                                fontSize = 18.sp, color = Color.White)

                            Text(text = stringResource(id = R.string.humidity_unit),
                                modifier = Modifier
                                    .padding(start = 5.dp, top = 8.dp, end = 0.dp, bottom = 5.dp),
                                textAlign = TextAlign.Start,
                                fontSize = 16.sp, color = Color.White)
                        }

                        Row(modifier = Modifier,
                            horizontalArrangement = Arrangement.SpaceBetween,
                            verticalAlignment = Alignment.CenterVertically) {

                            Text(text =stringResource(id = R.string.pressure),
                                modifier = Modifier
                                    .padding(start = 10.dp, top = 5.dp, end = 10.dp, bottom = 5.dp),
                                textAlign = TextAlign.Start,
                                fontSize = 18.sp, color = Color.White)

                            Text(text = weather.pressure.toString(),modifier = Modifier
                                .padding(start = 0.dp, top = 5.dp, end = 5.dp, bottom = 5.dp),
                                textAlign = TextAlign.Center,
                                fontSize = 18.sp, color = Color.White)

                            Text(text = stringResource(id = R.string.pressure_unit),
                                modifier = Modifier
                                    .padding(start = 5.dp, top = 8.dp, end = 0.dp, bottom = 5.dp),
                                textAlign = TextAlign.Start,
                                fontSize = 16.sp, color = Color.White)
                        }

                    }
                    val imageUrl = weather.icon
                    Image(
                        painter = rememberAsyncImagePainter(imageUrl),
                        contentDescription = null,
                        modifier = Modifier
                            .size(100.dp)
                            .padding(start = 0.dp, top = 0.dp, end = 20.dp, bottom = 0.dp)
                    )

                }
            }
        }
        Spacer(Modifier.size(20.dp))
    }
}
8. 出来上がり
コードはこちら: Kazu0721/WeatherForecastJp
デザイン、構成等まだまだ勉強します。
こんな感じです。